



How Do You Select NOSHOK Pressure Gauges?

Last Updated: October 30, 2026
Quick Summary
Select noshok pressure gauges by starting with the pressure range, sizing normal operating pressure near the middle of the dial rather than to the maximum spike. Then choose accuracy class from your process tolerance, match construction and wetted materials to your environment and medium, and add liquid fill or a restrictor where vibration and pulsation are present.
- Size the gauge so normal operating pressure sits near the middle of the dial.
- Accuracy class is a percentage of full scale, not of the displayed reading.
- A liquid-filled gauge dampens needle movement caused by vibration and pulsation.
- Match both the socket and the bourdon tube to the medium, not just the socket.
- If the peak is unknown, size the range at roughly 1.5 to 2 times normal operating pressure.
Table of Contents
- Step 1: Define Your Pressure Range and System Conditions
- Step 2: Choose Accuracy Class and Dial Size for Readability
- Step 3: Match Gauge Construction to Your Environment
- Step 4: Ensure Pressure Gauge Wetted Materials Compatibility
- Step 5: Select the Right Gauge for Pneumatic Applications
- Step 6: Plan Pressure Gauge Installation and Maintenance
- Pressure Gauge Range Selection: Sizing for Fluctuating Systems
- Get Expert Help Selecting NOSHOK Pressure Gauges
- Frequently Asked Questions
Step 1: Define Your Pressure Range and System Conditions
Selecting NOSHOK pressure gauges starts with one number: the pressure range. Get this wrong and the gauge either reads poorly or fails early.
Start by writing down two figures for your system:
- Normal operating pressure: where the system runs most of the day
- Maximum working pressure: the highest spike the gauge will ever see
Size the gauge so normal pressure sits near the middle of the dial. A gauge that runs at the top of its scale wears out fast and reads inaccurately.
Watch out: never size a gauge to your maximum spike alone. A gauge sized for the spike will barely move during normal operation, and you will not see small changes that matter.
Pressure range selection also depends on the type of service. Steady pressure and pulsating pressure call for different approaches, which we cover further down.
Step 2: Choose Accuracy Class and Dial Size for Readability
Accuracy class and dial size work as a pair, but the pairing only makes sense once you understand what an accuracy specification actually promises. Most selection mistakes here come from reading the class number as a percentage of the displayed value rather than as a percentage of full scale.
Accuracy class is a full-scale error band. A gauge marked with a tighter class does not give you a proportionally tighter reading at low pressure, it gives you a fixed error band across the whole dial.
A gauge’s stated accuracy is a percentage of full scale, not of the reading. At low pressure on a wide-range gauge, the error band can be a large fraction of the number you actually care about.
Work through the logic in this order:
- Define the process tolerance. Decide how much error your decision-making can absorb. If an operator acts on a 5 psi change, the gauge error band must be meaningfully smaller than 5 psi at the pressure where you operate.
- Convert tolerance to a full-scale requirement. Divide your allowable error by the accuracy class (expressed as a decimal) to get the maximum full-scale range that keeps the error band inside tolerance. A tighter class lets you use a wider range; a looser class forces a narrower range.
- Check dial resolution against the error band. The smallest graduations on the dial should be fine enough that the error band spans a readable number of divisions. If the error band covers only one or two graduations, the dial is too coarse to show the precision the class implies.
- Match dial size to viewing distance. Small dials suit tight panels and close viewing; mid-size dials fit most general industrial use; large dials help when operators read from several feet away. Dial size does not change accuracy, it changes whether the operator can resolve the accuracy you paid for. For a dedicated walkthrough, see how to choose pressure gauge size.
Pick the accuracy class from the process tolerance first, then pick the smallest dial that lets an operator resolve that error band from the actual viewing distance.
Avoid over-specifying. If nobody acts on small pressure changes, a tighter class just costs more and buys nothing. Avoid under-specifying. If the error band is wider than the change you need to detect, the gauge cannot do the job no matter how carefully it is installed.
One rule of thumb: match the accuracy class to what you actually do with the reading, and match the dial size to who reads it and from where. Those are two separate decisions that happen to be made together.
Step 3: Match Gauge Construction to Your Environment
Environment decides construction. Vibration, moisture, temperature swings, and corrosive air all push you toward a different gauge body.

A dry gauge works well in clean, steady, indoor settings. It costs less and needs less upkeep.
A liquid-filled gauge dampens needle movement caused by vibration and pulsation. The fill also protects internal parts from moisture and dirt. For pumps, compressors, and anything that shakes, liquid fill is the safer choice.
For harsh or corrosive surroundings, look at case material and sealing. Stainless steel cases and sealed windows hold up better where washdowns or chemical vapors are common. For deeper advice, see preventing pressure gauge failure in corrosive environments.
Step 4: Ensure Pressure Gauge Wetted Materials Compatibility
Wetted materials compatibility is the difference between a gauge that lasts years and one that clogs or corrodes in weeks. The wetted parts are everything that touches your measured medium: the socket, the bourdon tube, and any seal.
Work through this checklist for every application:
- Identify the medium: gas, liquid, steam, slurry, or sanitary product
- Check the medium’s corrosion behavior against brass, steel, and stainless steel
- Confirm the temperature at the gauge, not just at the process
- Note any solids or viscosity that could block the socket
- Decide whether a diaphragm seal is needed to isolate the gauge
For thick, dirty, or highly corrosive media, a diaphragm seal protects the gauge and keeps the reading clean. Learn how to size diaphragm seals for your application.
A common mistake is matching only the socket material and ignoring the bourdon tube. Both touch the medium, so both must suit it.
Step 5: Select the Right Gauge for Pneumatic Applications
Pressure gauge selection for pneumatic applications follows the same logic, with two twists: air systems pulse, and air systems are everywhere.
Compressors and pneumatic tools send rapid pressure pulses through the line. A dry gauge on that line will flutter and wear out. Choose a liquid-filled gauge or add a restrictor to steady the needle.
Pneumatic systems also tend to run at lower pressures. A low-pressure gauge gives you a readable scale in that band. A high-pressure gauge would compress all your normal readings into a sliver of the dial.
Also confirm the connection type matches your air line fittings before ordering. Thread mismatches are a common source of downtime.
Step 6: Plan Pressure Gauge Installation and Maintenance
Pressure gauge installation and maintenance planning starts before the gauge arrives. Mounting position, connection location, and access for service all affect how long the gauge lasts.
Installation basics:
- Mount the gauge where the operator can read it at eye level
- Use a gauge socket or siphon to protect the gauge from heat and pressure shock
- Add a snubber or restrictor where pulsation is present
- Support the line so the gauge does not carry pipe weight
- Check for leaks at the connection after startup
Maintenance is where lifecycle cost lives. Gauges drift over time, so plan periodic checks. When a gauge fails, decide early whether to repair or replace.
Mass Measure offers repair and calibration services, so a failed gauge does not always have to become a new purchase.
Pressure Gauge Range Selection: Sizing for Fluctuating Systems
Fluctuating and pulsating systems need extra range, but the reason is mechanical, not cosmetic. Every pressure pulse flexes the bourdon tube. A tube that flexes millions of times at high amplitude fatigues and drifts; a needle that slams against the stop loses accuracy fast. Sizing the range and adding the right protection are two halves of the same decision.
Here is how we approach it:
| System Type | Range Approach | Extra Protection |
|---|---|---|
| Static pressure | Normal pressure near mid-scale | None needed |
| Mild fluctuation | Size above the normal band | Snubber recommended |
| Heavy pulsation | Size well above normal, below max | Liquid fill plus restrictor |
| Pressure spikes | Account for spike peak | Siphon or surge protector |
The goal is simple: keep normal operation in the middle of the dial and keep spikes from pegging the needle.
Size for the peak you can document, not the peak you imagine. If you know the maximum working pressure from a relief valve setting, a compressor rating, or a recorded trend, size the range so that peak lands in the upper portion of the dial without pinning the needle.
Understand what each protection device actually does. These are not interchangeable:
- A snubber or restrictor limits how fast pressure reaches the bourdon tube. It protects the movement and steadies the needle, but it does not remove the pressure cycles from the tube itself.
- Liquid fill (typically glycerin or silicone) dampens needle motion and lubricates the movement, and it also protects internal parts from moisture and dirt. It is the better choice when vibration and pulsation arrive together.
- A siphon protects against steam and high-temperature media by keeping the gauge cooler; it is not a pulsation fix.
- A surge protector or pressure-limiting valve absorbs spikes before they reach the gauge.
For systems with rapid pulses, liquid fill and a restrictor together give the best needle stability. One without the other leaves a gap: fill alone still lets the tube see every cycle, and a restrictor alone leaves the movement exposed to vibration.
Do not size a gauge to its maximum spike alone. A gauge sized for the spike will barely move during normal operation, and you will not see small changes that matter. Size for normal operation near mid-scale, then protect against the spike.
When the system is truly unknown, start with a gauge that has a wider range than you think you need, record for a shift or a week, then specify the production gauge from the recorded normal band and peak. That sequence costs less than replacing a gauge that was sized from a guess.
Get Expert Help Selecting NOSHOK Pressure Gauges
Matching a part number to a legacy system is where many buyers get stuck. One wrong digit and you have the wrong range, thread, or material.
Mass Measure is a fully authorized distributor of the complete NOSHOK line. That includes in-stock availability for bulk purchases, bulk pricing that includes tariff charges, and manufacturer-backed warranties.
When you are ready to buy, you can browse NOSHOK pressure gauges online and check Mass Measure’s website for current pricing or a quote.
Frequently Asked Questions
What pressure range should I choose for a pressure gauge?
Select a gauge range so normal system pressure falls between 25% and 75% of full scale. For fluctuating or pulsating systems, aim for normal pressure at or below 50% of full scale to avoid overpressure damage. Always verify the maximum working pressure does not exceed the gauge’s rated limit. For example, a system operating at 100 psi should use a gauge with a 0-200 psi range for static service, or 0-300 psi for pulsating service.
How do I ensure pressure gauge wetted materials compatibility?
Match the gauge’s wetted materials (socket, Bourdon tube, and diaphragm seal) to your process medium. For corrosive fluids, choose stainless steel or alloy construction, or add a diaphragm seal. Check temperature limits and chemical resistance charts from the gauge documentation. Always confirm compatibility before installation to prevent premature failure.
What is the most accurate pressure gauge?
Accuracy depends on the gauge type and application. Accuracy specifications vary by gauge type and application, so review the class stated on the specific gauge you are considering. Consider the total measurement uncertainty, including temperature effects and installation conditions, when selecting accuracy class.
How do I select a pressure gauge for a pneumatic application?
For pneumatic applications, choose a gauge with a range that covers the system’s operating pressure, typically 0-150 psi or 0-300 psi. Use a dry gauge for clean, dry air; if moisture or pulsation is present, consider a liquid-filled gauge. Ensure the connection size (often 1/4 NPT) matches your system.
Picking the right gauge should not feel like a gamble. Mass Measure gives you verified authenticity, responsive technical support, and one partner for the full lifecycle of your instrumentation. Get started with Mass Measure and order the right NOSHOK gauge the first time.

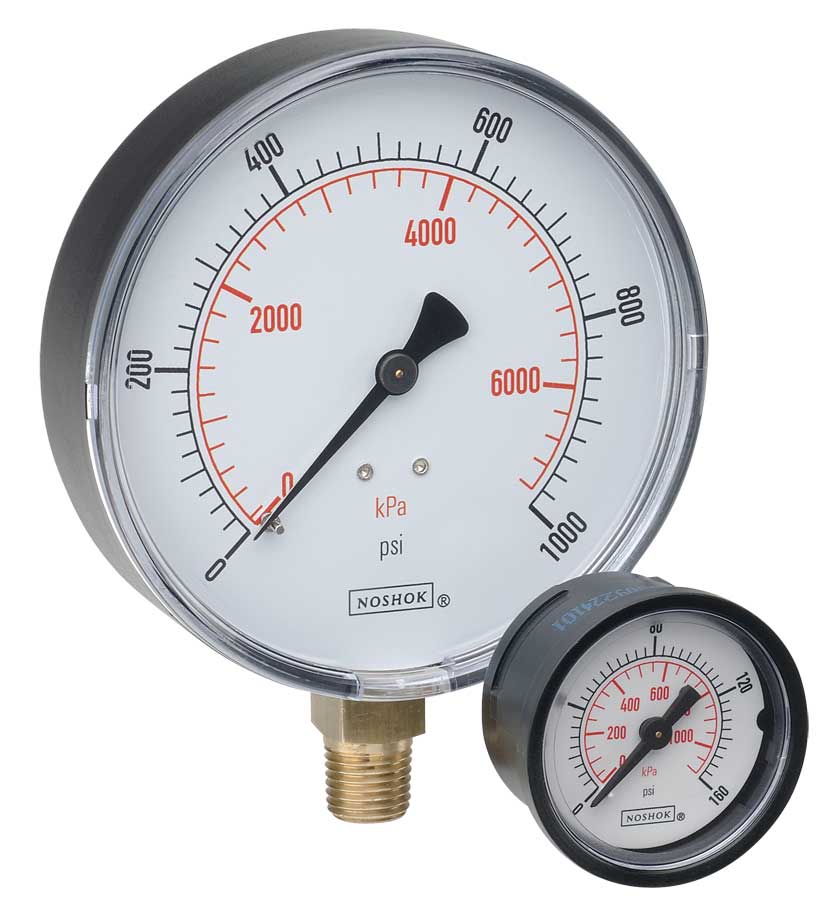 NOSHOK ABS & Steel Dry Pressure Gauges 100 series
 NOSHOK Low Pressure Dry Pressure Gauges-( 200 series)
 NOSHOK PT40 Series High Accuracy Transmitters-Replaces 100,200,615 series
