



Industrial Pressure Gauge Repair vs Replace: 2026 Guide

Table of Contents
- Industrial Pressure Gauge Repair vs Replace: How to Decide
- Common Industrial Pressure Gauge Failure Causes
- Pressure Gauge Repair and Calibration: What Can Be Fixed
- Pressure Gauge Replacement Selection: Choosing the Right Gauge
- Repair vs Replace: Cost, Downtime, and Safety Factors
- Post-Repair Verification and Acceptance Criteria
- Conclusion: Making the Right Call for Your Operation
- Frequently Asked Questions
Last Updated: October 16, 2026
Industrial Pressure Gauge Repair vs Replace: How to Decide
A pressure gauge that drifts, sticks, or fails outright puts your whole process at risk. This guide from Mass Measure breaks down industrial pressure gauge repair vs replace so you can make the call with confidence.
Most gauges fail for predictable reasons. A worn seal, a clogged socket, or a Bourdon tube that took one overpressure event too many. Some of these you can fix. Others you cannot.
Here is the short answer. If the gauge is liquid-filled, has a damaged Bourdon tube, or sits on safety-critical equipment, replace it. If the problem is a clogged connection, a loose fitting, or a pointer that just needs recalibration, repair often makes sense.
“The best decision is the one you can document. If you cannot verify the gauge afterward, you have not fixed anything.” This is the rule we follow at Mass Measure when we service gauges for oil and gas, chemical, and water treatment teams.
Below, we walk through the failure causes, what is repairable, and how to pick the right replacement.
The Repair-or-Replace Decision Framework
Start with three questions. What failed? Can it be verified after repair? What does downtime cost you?
If the failure is external (a leak, a loose connection, a worn seal), repair is usually the cheaper path. If the failure is internal (a distorted Bourdon tube, a bent pointer linkage, corrosion inside the case), replacement wins almost every time.
| Factor | Repair | Replace |
|---|---|---|
| Failure type | External, minor | Internal, structural |
| Gauge type | Dry, standard | Liquid-filled, diaphragm |
| Safety role | Non-critical | Safety-critical |
| Downtime tolerance | Flexible | Tight |
| Verification | Needs calibration | Factory-certified |
Use this table as a first filter. If two or more factors point to replace, do not spend time on a repair quote.
Common Industrial Pressure Gauge Failure Causes
Industrial pressure gauge failure causes fall into two groups: mechanical and process-related. Knowing which one you are dealing with tells you whether repair is even possible.
Mechanical and Process-Related Failures
Mechanical failures come from wear and handling. Process failures come from what the gauge is measuring.
- Overpressure: The most common killer. One pressure spike past the range can distort the Bourdon tube for good.
- Vibration: Constant shake wears the movement and linkage, causing the pointer to drift.
- Corrosion: Aggressive media eats the wetted parts, socket, and seals.
- Clogged socket: Solids or debris block the pressure port, so the reading freezes.
- Temperature extremes: Heat or cold changes the elasticity of the tube and skews accuracy.
- Worn seals and loose connections: Small leaks at the fitting drop the reading and let moisture in.
A common mistake is blaming the gauge when the real problem is the process. If a gauge keeps failing in the same spot, check the process conditions first. The gauge is often just the messenger.
Pressure Gauge Repair and Calibration: What Can Be Fixed
Pressure gauge repair and calibration can fix external problems: leaks, clogged ports, worn seals, and pointer drift. Internal damage to the Bourdon tube, movement, or linkage usually cannot be repaired to spec.
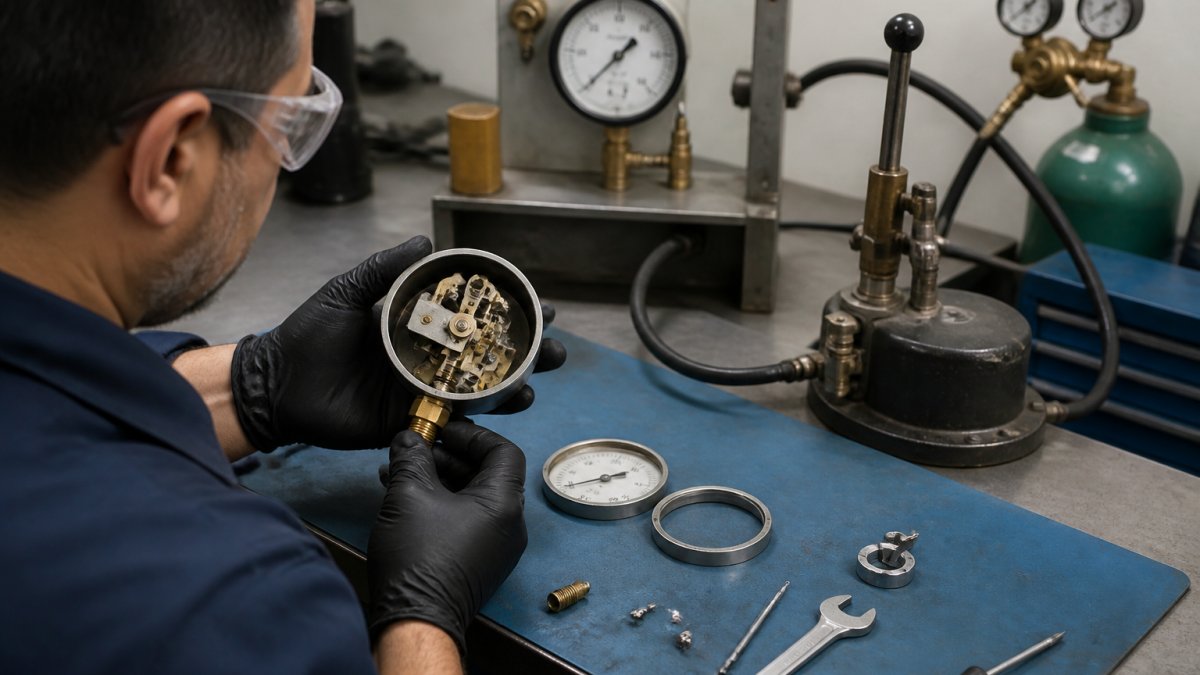
What is repairable:
- Replacing seals and gaskets
- Cleaning a clogged socket or pressure port
- Tightening or replacing a loose connection
- Recalibrating the pointer to a known pressure source
- Refilling a liquid-filled case
What is not worth repairing:
- A distorted or cracked Bourdon tube
- A bent or broken movement and linkage
- Heavy internal corrosion
- A cracked case or lens on a sealed unit
How to Calibrate a Pressure Gauge After Repair
Calibration confirms the gauge reads true before it goes back into service. Here is the process we use.
- Connect the gauge to a known pressure source.
- Apply pressure at 0%, 25%, 50%, 75%, and 100% of range.
- Record the reading at each point.
- Compare against the reference gauge.
- Adjust the pointer if it drifts outside tolerance.
- Repeat until the error is within spec.
Expected result: The gauge tracks the reference across the full range, with no sticking or lag.
Never skip calibration after a repair. A gauge that looks fixed but reads wrong is more dangerous than one that is clearly broken, because it gives false confidence.
Pressure Gauge Replacement Selection: Choosing the Right Gauge
Pressure gauge replacement selection comes down to five specs: range, accuracy, materials, fill, and connection. Get these right and the new gauge will outlast the old one.
Match the range so normal operating pressure sits in the middle of the dial. A gauge running at the top of its range wears out fast.
Pressure Range, Overpressure, and Accuracy Considerations
Pick a range where your normal pressure lands near the midpoint. That gives you headroom for spikes without pinning the needle.
- Range: Normal pressure should sit at roughly 50% of full scale.
- Overpressure: Choose a gauge rated to survive your worst-case spike.
- Accuracy: Standard gauges suit most jobs; tight-tolerance processes need a higher grade.
- Materials: Match the wetted parts to your media to stop corrosion.
- Fill: Liquid-filled gauges handle vibration and pulsation better.
- Connection: Confirm thread size and type before you order.
The thing nobody tells you about replacement: order the exact part number, not a “close enough” match. Legacy equipment often needs a specific series, and a mismatched thread or range will fail early. This is where a supplier who knows the product line saves you a return and a week of downtime.
::: Precision in procurement remains the most effective strategy for minimizing equipment downtime when integrated into a broader maintenance workflow.
Repair vs Replace: Cost, Downtime, and Safety Factors
Repair is cheaper on paper. That is the whole argument, and it is incomplete. The real comparison is total cost of ownership across the remaining service life of the gauge, and it has five line items most teams never add up.
The five cost components
- Parts. Seals, gaskets, a replacement lens, a refill kit, a new movement. Small individually, but a movement swap on a liquid-filled gauge can approach the price of a new standard gauge.
- Labor. Bench time to disassemble, clean, reassemble, and calibrate. This is the line item that quietly kills the repair case on low-cost gauges, an hour of skilled technician time can exceed the price of a basic dry gauge.
- Calibration and documentation. The reference equipment, the technician’s time, and the record itself. If the application is regulated, this is not optional.
- Downtime. The cost of the line being down or running blind while the gauge is out. This is usually the largest number on the page and the one most often left off the quote.
- Freight and turnaround. Shipping to a repair shop and back, plus the calendar time it consumes.
When repair wins on cost
Repair is the better economic call when the gauge is expensive to replace relative to the repair, when the fault is external and the fix is fast, when the gauge is a non-standard or legacy configuration that is hard to source, and when the line can tolerate the gauge being out of service. In those cases the parts-and-labor total is genuinely lower and the downtime cost is near zero.
When replacement wins on cost
Replacement wins when the gauge is a commodity item, when the fault is internal, when the repair turnaround exceeds the replacement lead time, or when the application is safety-critical and the verification burden on a repair is high. A new gauge arrives with a manufacturer’s accuracy specification and a warranty; a repaired gauge arrives with a piece of paper you wrote yourself.
Downtime, lead time, and spare-gauge planning
The operational math is simple: compare repair turnaround against replacement lead time, then compare both against how long the process can run without the gauge.
- Repair turnaround depends on the shop’s backlog, parts availability, and whether the gauge needs to be shipped out. It is often measured in days to weeks.
- Replacement lead time depends on whether the gauge is a stocked standard or a configured item. Common ranges, connections, and materials are frequently available from stock; special ranges, exotic wetted materials, and diaphragm seals are built to order.
- Spare-gauge planning is the lever that removes downtime from the equation entirely. Keeping one spare of every critical gauge on the shelf converts a two-week repair into a same-day swap, and the failed unit can then be repaired on a relaxed schedule or scrapped without pressure.
A practical rule many reliability teams use: stock spares for any gauge whose failure would stop or degrade production, and treat those spares as insurance rather than inventory. The carrying cost is small compared to an unplanned outage.
Safety and compliance decide the rest
On safety-critical equipment, never gamble on a repair you cannot fully verify. Applicable site procedures, equipment requirements, and calibration records govern whether a gauge is allowed back into service at all, and in regulated processes, an undocumented repair is treated as no repair. Replace it, document it, and move on.
For safety-critical service, replacement is the default. For non-critical lines with external failures and a stocked spare, repair is a sound, lower-cost option. For everything in between, add up all five cost components before you decide.
Post-Repair Verification and Acceptance Criteria
Post-repair verification proves the gauge is fit to return to service. Without it, you are guessing.
Acceptance criteria to check:
- The gauge reads within its stated accuracy across the full range
- No leaks at the connection under pressure
- The pointer moves smoothly with no sticking
- A calibration record is signed and dated
- The gauge is tagged with its next service date
If any item fails, reject the gauge. Do not put it back on the line.
This is also where documentation matters. In regulated plants, an unsigned repair is an unverified repair. Keep the records.
Conclusion: Making the Right Call for Your Operation
Every failed gauge forces a choice, and guessing costs you time, money, or safety. The right call comes down to failure type, downtime, and how critical the gauge is.
At Mass Measure, we handle both sides of that decision. As a fully authorized distributor of NOSHOK products, we supply the right replacement gauge the first time, with in-stock availability and bulk pricing that includes tariff charges. Our team also provides repair and calibration services, backed by manufacturer-standard warranties.
Contact us to get the right gauge or a fast repair turnaround, and keep your process running.
Frequently Asked Questions
Can an industrial pressure gauge be repaired, or does it always need to be replaced?
Many industrial pressure gauges can be repaired, especially liquid-filled gauges and those with replaceable internals. Common fixes include resealing leaks, replacing worn seals, and recalibrating the pointer. However, if the Bourdon tube is cracked, the case is corroded through, or the gauge has been exposed to severe overpressure, replacement is usually the safer and more cost-effective choice. A qualified technician can assess repair feasibility by inspecting the gauge internals and running a calibration check.
How do I know if my pressure gauge is inaccurate?
Signs of an inaccurate pressure gauge include a pointer that does not return to zero when pressure is released, readings that drift compared to a known reference, and visible pointer damage. You can verify accuracy by connecting the gauge to a calibrated pressure source and comparing readings across the full pressure range. If the measurement error exceeds the gauge’s accuracy class, recalibration or replacement is needed. Routine inspection and calibration checks catch these issues before they affect process safety.
What causes an industrial pressure gauge to fail?
Common failure causes include overpressure events that deform the Bourdon tube, corrosion from aggressive process media, vibration that wears internal linkages, and loose or damaged connections that cause leaks. Temperature extremes can also affect accuracy and accelerate seal degradation. Liquid-filled gauges resist vibration better but can still fail if the fill fluid is contaminated. Identifying the failure cause helps you decide whether repair is feasible or whether a different gauge type would last longer in that application.
How often should industrial pressure gauges be inspected or calibrated?
Inspection frequency depends on process conditions and how critical the measurement is. Many facilities inspect gauges monthly and calibrate every six to twelve months, but high-vibration, corrosive, or safety-critical applications may need more frequent checks. After any repair or recalibration, verify the gauge against a traceable pressure source before returning it to service. Documenting each inspection and calibration creates a service history that supports both maintenance planning and compliance requirements.
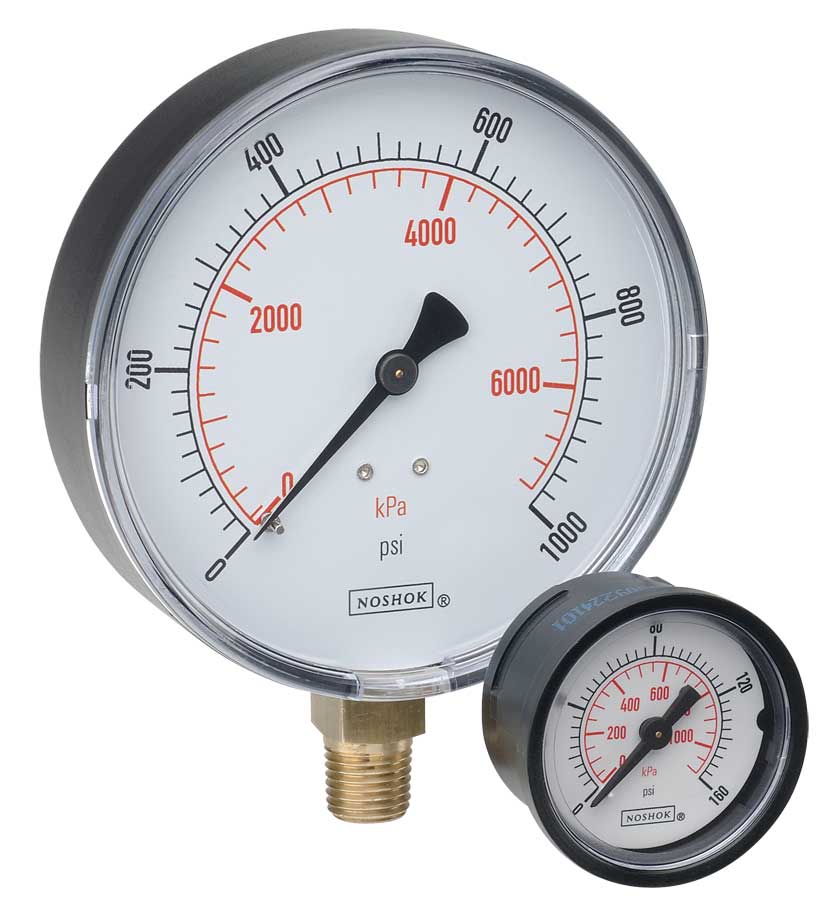 NOSHOK ABS & Steel Dry Pressure Gauges 100 series
 NOSHOK Low Pressure Dry Pressure Gauges-( 200 series)
 NOSHOK PT40 Series High Accuracy Transmitters-Replaces 100,200,615 series
